Blog

All Dirt Werx LLC Blog Data Center Construction Dirt Werx Service
Retaining wall designs used in Pennsylvania construction. Dirt Werx.

Retaining Wall Design And Its Types Used In Construction

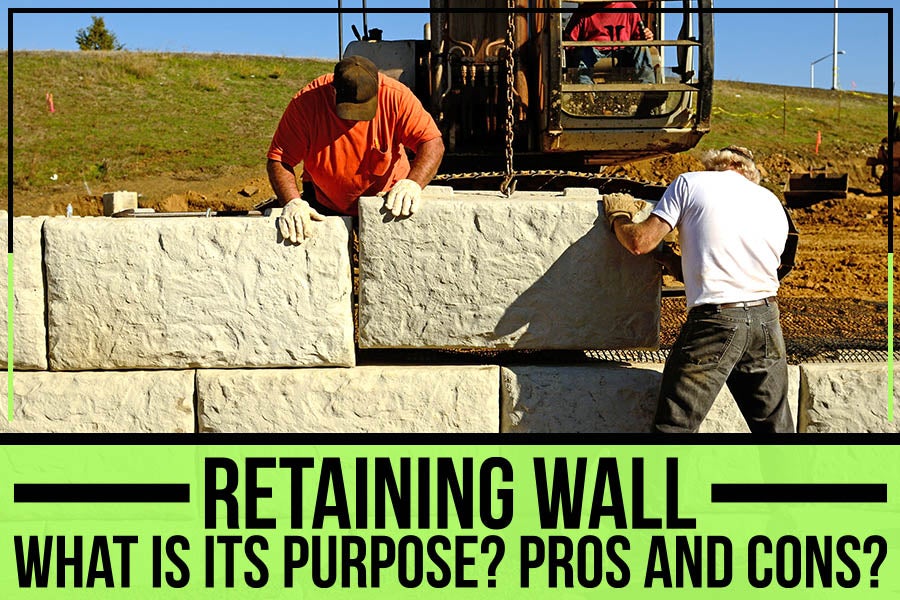
Key Takeaways: Retaining walls can be made from concrete or stone and reinforced with counterforts or buttresses. These structures are designed to withstand gravity and lateral pressure They can be used for both temporary and permanent applications in construction projects. Don't let your outdoor space be held back by sloping soil – consider a retaining wall to add functional and aesthetic value to your landscape! Choose a retaining wall based on its function in your landscaping. Take into account the materials and colors that will complement your existing landscape. And remember: consult a professional engineer for the best solution for your project's needs when in doubt. Dirt Werx LLC offers construction services to customers in Bangor, ME, and the surrounding areas. Retaining walls are structures that hold soil or rock in place to prevent erosion and land slippage. Retaining walls are commonly used in civil engineering and landscape design to avoid deterioration and to manage stormwater runoff. A lot of thought goes into the retaining wall design. You want to ensure that the wall can withstand the pressure of the earth behind it while also looking attractive and fitting in with the rest of your landscaping. There are various types of retaining walls, each with advantages and disadvantages. Dirt Werx LLC will discuss the different types of retaining walls and when you should use them. We will also share tips on choos ing the right retaining wall for your needs. So, if you are considering adding a retaining wall to your property, read on! Different Types of Retaining Walls and When to Use Them 1. Gravity Walls Gravity walls rely on their weight to bear the lateral pressure of the soil. They are made of heavy materials such as concrete, stone, or brick. Gravity walls are typically used for taller walls, which can be expensive. 2. Cantilevered Walls Cantilevered walls are similar to gravity walls in that they resist the lateral pressure of the soil through their weight. However, cantilevered walls have additional support at the top of the wall that helps to increase their stability. Cantilevered walls are typically made of concrete or stone and are often used for taller walls. 3. Sheet Pile Walls Sheet pile walls are interlocking metal, wood, or plastic sheets that are driven into the ground. The sheets are then filled with concrete or another material to create a solid wall. Sheet pile walls are often used in areas with a high water table or unstable soil. 4. Soldier Pile and Lagging Walls Soldier piles and lagging walls consist of vertical piles driven into the ground and horizontal beams placed between the ridges. The space between the ridges is then filled with concrete or another material. Soldier piles and lagging walls are often used with a high water table or where the soil is unstable. 5. Soil-Nailed Walls Soil-nailed walls consist of rows of nails driven into the ground at an angle. The pins are then connected with a horizontal beam or cable. Soil-nailed walls are often used in areas with a high water table or unstable soil. 6. Reinforced Earth Walls Reinforced earth walls consist of layers of soil that are held together by a network of reinforcement materials such as steel cables or mesh. Reinforced earth walls can be used in a range of applications, including retaining walls, slope stabilization, and tunnel lining. 7. Gabion Walls Gabion walls consist of metal cages that are filled with rocks or other materials and then sealed with a wire mesh. They can be used in various applications, including retaining walls, slope stabilization, and erosion control. 8. Counterfort Retaining Walls Counterfort retaining walls are made of concrete or steel beams that are reinforced with counterforts (vertical supports). They are designed to resist the force of both gravity and lateral pressure. These walls are used for both temporary and permanent fencing. 9. Buttress Retaining Walls Buttress retaining walls are concrete or stone blocks reinforced with buttresses (horizontal supports). They are designed to resist the force of both gravity and lateral pressure. Buttress walls are also effective for both temporary and permanent fencing. Click here to learn about the retaining wall permit requirement in Maine. Tips on Choosing the Right Retaining Wall 1. Determine the Purpose of the Retaining Wall The first step in choosing the right retaining wall is to determine the purpose of the wall. Are you looking to create a functional fence that will help to hold back soil, or are you looking for a decorative border that will add visual interest to your landscape? Once you have determined the wall's purpose, you can narrow down your choices. 2. Consider the Height of the Retaining Wall Another critical factor to consider when choosing a retaining wall is the height of the wall. Retaining walls can range from a few feet to over 20 feet tall. Selecting a retaining wall that is tall enough to achieve your desired goal is crucial but not so tall that it becomes unsafe or unstable. 3. Choose the Material for the Retaining Wall There are several materials for retaining walls, including concrete, stone, brick, and wood. Each material has advantages and disadvantages, so choosing a material that best suits your needs is vital. For example, concrete walls are very strong and durable but can be expensive and difficult to install. Stone walls are beautiful and natural-looking but can be costly and heavy. Brick walls are cheaper than stone walls, but they may need to be stronger. Wood walls are relatively inexpensive and easy to install, but they may only last for a short time as other materials. 4. Consider the Cost of the Retaining Wall Cost is always a decisive factor when choosing any home improvement project. Retaining walls can vary widely in cost, depending on the material you choose and the size of the wall. Be sure to get several estimates before making a final decision to ensure you are getting the best value for your money. 5. Make Sure the Wall Is Designed Properly It's essential to make sure that any retaining wall you choose is appropriately designed. It means that it should be able to withstand both lateral and vertical loads without failing. Consult a professional before making your final decision. 6. Choose a Color That Compliments Your Home If you're choosing a retaining wall for aesthetic purposes, then it's essential to select a color that compliments your home. You don't want your retaining wall to stick out like a sore thumb, so take some time to consider what will work best with your existing landscape. 7. Consider Drainage When Choosing a Retaining Wall Drainage is essential when choosing a retaining wall. Poor drainage can lead to problems such as foundation damage or soil erosion. There are various ways to improve drainage around a retaining wall, such as installing drains or using perforated pipes. Also, read our blog on what to consider when choosing the retaining wall for your property. Need Landscaping Services in Bangor, ME? No Problem! Dirt Werx LLC is a diversified contracting company providing numerous construction services, including Excavation, Demolition, Land Clearing, and more. We're excited to offer our residential and commercial excavation or retaining wall construction services in Bangor, ME. If you need a free estimate for your next project, don't hesitate to contact us today! Happy building!

Safeguarding Your Septic Tank In Winters

Key Takeaways: Winters can cause problems for septic tanks, including freezing and thawing of the ground, damaging the tank. You can safeguard your septic system by having it professionally inspected and cleaned before winter and ensuring that any repairs are done promptly. If you experience sewage backup in your home, it's a sign that you need a new septic system installation. Hire a professional contracting company to install a new septic tank in your home. Your septic system is out of sight and mind, buried beneath the snow and ice - but it's important not to forget it during the coldest months of the year. Taking simple precautions can help safeguard your septic system and keep it running all winter smoothly. Dirt Werx LLC explains how winter can affect your septic tank. We'll also help you keep your septic safe and protected during the snow season. How are Septic Tanks Affected During Winter? Septic tanks are designed to withstand the elements, but that doesn’t mean they’re impervious to frigid temperatures. When water freezes, it tends to expand, so when the temperature dips too low, it can cause serious problems. At its simplest, a septic system is full of water and waste. When the water inside freezes, the pressure inside the tank builds up as the water expands, it can cause cracks and even breakage if the problem is unchecked. In addition, snow and ice can block access to ports and vents, preventing air from circulating and causing the system to back up. This can lead to serious - and expensive - repairs, so protecting your septic tank during winter is essential. 7 Ways to Protect your Septic System During Winter When the water in the tank freezes, it can cause the sewage to back up into your home. It can lead to some serious health hazards for you and your family. There are some things you can do to prevent this from happening: 1. Keep the Septic Tank Insulated: Professional contractors suggest insulating your septic system to keep the water inside from freezing. It can be done by using insulated pipes to ensure that the water flowing to and from your septic tank is at a consistent temperature. 2. Remove Trees and Plants Near the Septic System Trees and plants can damage the septic tank when roots grow around it, causing cracks. In winter, these roots can also freeze and cause further damage. It is best to remove any trees or plants that are close to the septic system to prevent this from happening. 3. Use a Septic Tank Cover A septic tank cover will help keep snow and ice off the tank's top, preventing the sewage inside from freezing. It is essential if you live in an area with much snowfall. 4. Keep the Tank Pumped Regularly Water in the septic tank rarely freezes. It is because water can hold a significant quantity of heat. However, the water inside can freeze if you haven't been home around much or your house has been vacant for a long time. Pumping the septic tank regularly will help keep it working correctly and prevent any backups. 5. Focus on Proper Waste Management One of the main reasons septic tanks get overloaded is that people flush things down the toilet that shouldn't be flushed. It includes diapers, feminine hygiene products, cigarette butts, and grease. During the winter, it's essential to focus on proper waste management to prevent any issues with your septic tank. It means only flushing biodegradable items down the toilet and disposing of non-biodegradable items in the garbage. 6. Check for Leaks Regularly Leaks are one of the most common problems with septic tanks. If there's a leak in your tank, it can cause raw sewage to leak into the ground around your home. It can contaminate groundwater and create health hazards for you and your family. 7. Use Eco-friendly Chemicals If you use strong chemicals for cleaning your toilet or drains, it can damage the bacteria in your septic tank that helps to break down waste. It can increase the risk of a clog or blockage. Instead, use eco-friendly cleaners that are safe for septic tanks. Top 3 Signs Your Septic Tanks Is In Need of a Replacement According to Environment Protection Agency, septic tanks have an average lifespan between 15-40 years, depending on their size and maintenance. However, any damage to the tank caused by tree roots, flooding, or other factors can shorten its lifespan. If you're unsure whether you need a new septic tank installation, consider these signs: 1. Foul Odors If you notice foul smells coming from your drains or around your property, it could indicate damage in your septic tank. Damaged septic tanks can cause contamination of wastewater in surrounding areas, which gives off a foul stench. It can put your health at risk, so taking action as soon as possible is essential if you notice any foul odors. Contact a professional contractor at once so they can inspect and get a new septic tank installation done. 2. Slow Drainage If your drains are draining slower than usual, it could indicate a septic tank issue. When they fill up, the waste has nowhere to go and backs up into your drains. It can cause slow drainage and even blockages in your pipes. If you notice this happening, don't hesitate to contact a professional contractor for help. 3. Sewage Backup One of the most obvious signs that you need a new septic tank installation is if you experience sewage backup in your home. It is not only unsanitary, but it can also be dangerous to your health. Call a professional contractor immediately to get a new septic tank installation done if you see or smell sewage anywhere on your property. Also Read: Tasteful Disposal: 5 Types Of Residential Septic Systems Conclusion Suppose you're noticing any of the above signs. In that case, it's time to call a professional contractor for a new septic tank installation. Septic tanks are an important part of your home, and keeping them in good working condition is essential. With regular maintenance and care, your septic tank can last for many years. But when it's time for a new one, don't hesitate to call a professional to get the job done right. Professional Septic Tank Installation at Mount Bethel, PA If you need a new septic tank installation, Dirt Werx LLC is here to help. We're a professional contracting company serving the Mount Bethel, PA, area. With extensive experience, we're experts in septic system installation. We'll work with you to find the right septic system for your home and budget and ensure it is installed correctly. Contact us today to get a free estimate.

5 Arena Maintenance Tips For Horse Arenas

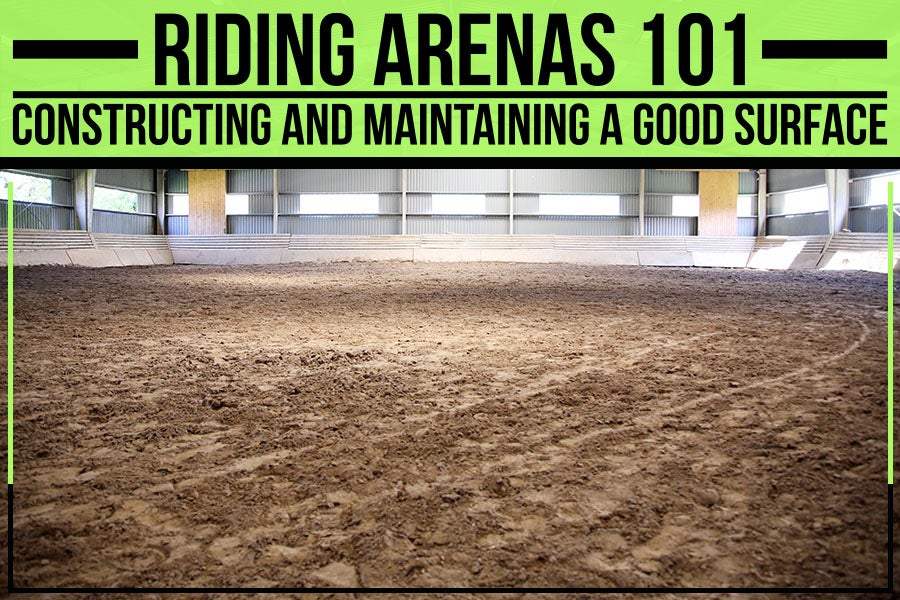
Key Takeaways: To keep a horse arena in good shape, you need to be consistent and use the right equipment—especially if it’s a jumping or dressage arena. Watering the arena regularly creates stability in the footing and prevents dust accumulation. High-quality sand and footing additives are major factors in a horse arena that dictate how the equestrian performs. Routine dragging evens the sand mixture and particle graduation by removing ground divots. Upkeeping your arena is a 3-fold process involving routines to be carried out daily, monthly, and yearly. Being a horse lover comes with a great responsibility of taking care of your horse and making sure they are comfortable at all times. You need a well-cared arena if you want your horse to do its best at competitions. The perfect amount of cushioning, good traction, and minimal dust are what horses need to perform their best. To keep a horse arena in good shape, you need to be consistent and use the right equipment—especially if it’s a jumping or dressage arena. The base of an arena can last for ten years with proper care, but its surface will degrade over time. That’s why it’s important to focus on the top layer when maintaining a horse arena. Ongoing watering and dragging are essential elements of proper arena upkeep, indoors and out. However, a comprehensive maintenance program must also include regular checks and balances to ensure that sand and footing additives remain in optimal condition. Let Dirt Werx help you develop a personalized arena maintenance schedule that fits your budget and busy lifestyle. Water The Arena for Controlling Dust 1. Install A Proper Irrigation System Having moist footing is key to a successful riding arena. Watering the arena regularly creates stability in the footing and prevents dust accumulation. The water works by binding sand fibers together. Water is the most crucial element, which means you need to find a watering system to fit your budget, no matter its size. A regular garden hose may be enough, or fully integrated moisture management systems are an option for more thorough coverage. An automated watering system is the most efficient way to water a large area evenly. Like other smart systems, automated water systems can be programmed to maximize cost-saving strategies like electricity and water usage. 2. Garden Hose If you're tight on budget, the garden hose with a high-velocity spray nozzle is one of the solutions for watering your horse arena. Remember that you'll need someone to do it by hand, in any case. Moreover, it's challenging for an individual to water an arena evenly, like how a mechanized system does it. If you're looking for a step up from the garden hose, try mounting a sprinkler on a tripod stand. This will reduce the amount of time needed to water an arena significantly. However, you will still need to monitor the water supply closely. Keep Sand & Additives Well-Mixed 1. Footing Additives & Sand High-quality sand and footing additives are major factors in a horse arena that dictate how the equestrian performs. But what are footing additives? They're materials mixed into the sand to improve its quality for arenas, specialty tracks, or racing venues through drainage, stability, cushioning, or controlling dust. How well an additive can mix into different types of sand is a design criterion companies must consider when manufacturing them. The stability of a horse arena's surface is essential and depends on the appropriate mix of footing additives and sand. 2. Sand Particle Graduation The graduation of sand particles is the term used to describe the various sizes of sand particles. Certain critical aspects to consider when choosing the proper horse arena sand depth. Different-sized particles are needed in an arena so that small pieces fill in the empty spaces between larger pieces. If the sand is gap graded or ungraded, it produces severe layer separation. In these difficult conditions, it's hard to mix the sand well, which leads to an unstable surface that you can easily roll up. 3. Arena Grooming Routine dragging evens the sand mixture and particle graduation by removing ground divots. The biggest sand particles end up on the top surface, and the smaller sand particles are below. The sifting effect of vibrations causes big particles to float to the top and very small ones to sink and settle at the bottom layer. If you don't have a grooming program in place, the different particle sizes of sand will eventually separate. Shaking and vibrations from horse arena usage cause granular segregation. It's important to fight the separation of layers so that footing additives remain evenly mixed with the sand. You can do this through regular grooming practices that keep the ground leveled & consistent. Read more about How to Choose the Right Horse Arena Sand Depth for Jumping Arena Maintenance Schedule Upkeeping your arena is a 3-fold process involving routines to be carried out daily, monthly, and yearly. Daily Maintenance You should drag your arena every day for the best results, though once every other day is fine if you don't ride it that often. Dampen your arena regularly to encourage the textile-based footing ingredients to bind together. Consistent moisture is key for a stable, long-lasting mix. Always clean up organic materials from your arena surface as soon as possible. Manure and urine create dust, spread bacteria, and change the surface texture if not dealt with immediately. Weekly Maintenance Once a week, dig and mix deeper to ensure that a proper blend of footing additive is maintained. While you're at it, hand-rake hard-to-reach spots too. Ideally, the arena should be dragged once a week when it is not used to maintain optimal conditions. If the arena has been used extensively, put in a re-conditioning session. If you notice any jumps in the arena, be sure to move them and properly condition the spots where they were originally located. Annual Maintenance Arena flipping is traditionally done yearly and is often seen as the equestrian version of spring cleaning. The process usually involves scraping down the bottom level to remix all footing components evenly. When flipping the sand, take a moment to evaluate the quality of the footing additives and sand. You may need more of either. Looking To Construct Your Horse Arena in Nazareth, PA? We Can Help! We build high-quality horse arenas at Dirt Werx, serving Nazareth, PA, and suiting various budgets and needs. Whether you need an indoor or outdoor arena for dressage, show jumping, reining, or western riding, we can create a custom design that will exceed your expectations. We also offer renovation and restoration services for existing arenas. Get a free estimate today!

Is Your Septic System Supporting Or Harming The Environment?

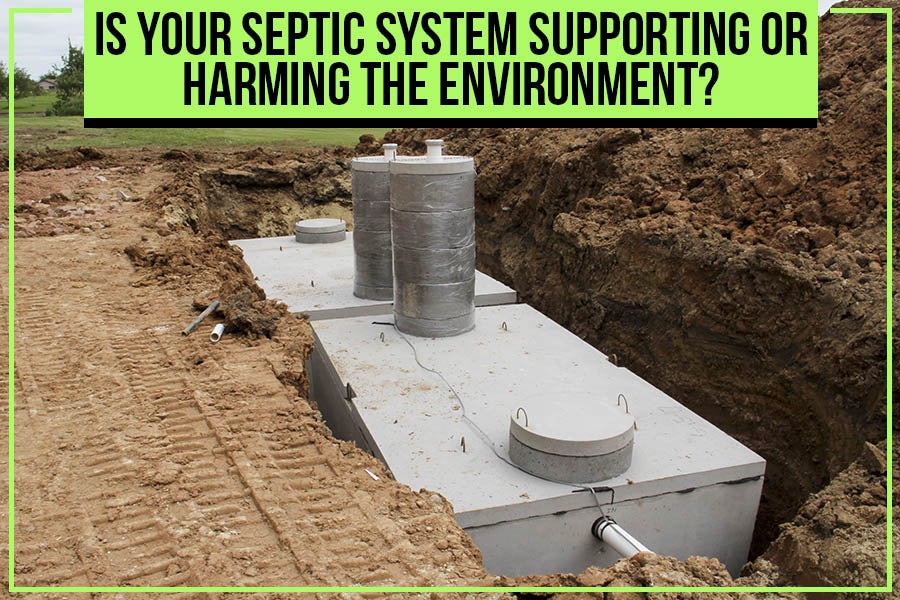
Key Takeaways 1. It is essential to have a septic system that works properly to protect the environment. 2. Properly functioning septic system protects the environment and decrease pollution. 3. Leak or other damages could result in environmental contamination. 4. If you have a septic system, check and get it checked and serviced regularly. 5. If you think there may be an issue with your septic system, it is always best to install a new one. 6. Be sure to maintain your septic system properly by having it inspected yearly and using water efficiently. When most people think about the dangers of water, they probably don't think about sewage. However, wastewater can harm your health and home if not handled correctly. According to a report, 7.2 million American fall to severe illness due to exposure to dirty water annually. If not adequately managed, sewage water could expose dangerous bacteria in the water supply. Septic System offers a solution to the problem. Like most homeowners, you probably don't think much about your septic system. But did you know that it can significantly impact the environment based on how well-maintained it is? Dirt Werx LLC will explain how your septic system works and discuss how it can harm or support the environment. We'll also provide a few tips on keeping your septic tank in good shape and protecting the environment. So, whether you're a homeowner with a septic system or interested in environmental protection, read on to learn more! What is a Septic Tank and How Does it Work? The EPA recommends that homeowners install septic tanks to ensure public health safety and water resource preservation. A watertight chamber receives sewage from your home through a pipe. The tank holds the sewage for some time so that waste solids can settle to the bottom while oils and grease float to the top. This process separates the liquids and solids in the sewage so that the liquids can be treated more easily. Bacteria break down the solid waste that settles at the tank bottom over time. This process produces methane gas, which is released into the atmosphere, and effluent, the liquid waste containing some dissolved solids. The effluent flows out of the septic tank and into a leach field, where bacteria further treat it before being released into the environment. How Does a Functioning Septic System Support the Environment? If you're wondering how septic system installation supports the environment, here are a few ways: 1. Reduces Pollution When sewage enters our waterways, it can pollute them and make them unsafe for swimming, fishing, and other recreational activities. By treating the sewage before it enters the waterways, septic systems help to keep them clean. 2. Supports Eco-System A healthy septic system supports local wildlife by providing them with a clean water source. When septic systems are properly maintained, they can provide a safe and reliable water source for animals and plants. Other than that, it helps promote a proper functioning eco-system. 3. Conventional Way of Treating Water Septic systems are a natural way of treating water. They use bacteria to break down sewage, which is then absorbed into the ground. This process is much safer for the environment than using chemicals to treat sewage. Hazards of Damaged Septic Tanks on the Environment Although septic systems are generally safe for the environment, the same can not be said for damaged ones. Here are some hazards damaged septic systems create for the environment. Increased Green House Gas Emissions According to recent studies, septic systems installed and working for five years or longer are susceptible to producing increased levels of greenhouse gases. Septic systems' methane and carbon dioxide can lead to climate change. Contamination of Groundwater Another hazard of damaged septic systems is that they can contaminate groundwater. The chemicals and waste that seep out of a damaged septic tank can find their way into the groundwater, making it unsafe to drink. It can also lead to the contamination of nearby lakes, rivers, and streams. Soil Erosion A damaged septic system could also damage the soil. The chemicals and waste that escape from it can eat away at the soil, causing it to erode. Over time, this can lead to sinkholes and damage to the landscape. Home Damage A damaged septic system close to your home can also damage your home. The chemicals and waste that escape from it can cause structural damage to your home, including foundation problems. Tips for Keeping a Well-Maintained Septic System To keep your system free from damage, it is best to invest some of your time in its proper maintenance. Here are a few simple ways that can ensure your septic system operates smoothly in the years to come. Pump your septic system every three to five years. Have your septic system inspected every year. Use water efficiently. Dispose of household chemicals and cleaners properly. Do not flush anything other than human waste and toilet paper down your toilets. Keep trees and shrubs away from the tank and leach field. These tips can help with septic system maintenance. But, if you find any issue or damage with your septic system, it is always best to replace it with a new one. A damaged system is a biohazard to keep around and can contaminate the environment. Also Read: Tasteful Disposal: 5 Types Of Residential Septic Systems Conclusion In conclusion, septic tanks are a great way to support the environment. They are efficient and easy to use while also being eco-friendly. Proper maintenance is crucial, but if it gets damaged, consider replacing it with a new one to prevent environmental damage. Professional Septic System Installation in Macungie, PA At Dirt Werx LLC, serving Macungie, PA, where we pride ourselves on our high-quality septic tank installation services. We promise experienced professionals will install your septic system so that you know the job gets done right and your tank will last for years. We also deal with excavation, demolition, and land cleaning other than our septic system installation. Contact us today to get a free estimate.
The Difference Between Trenching & Site Excavation

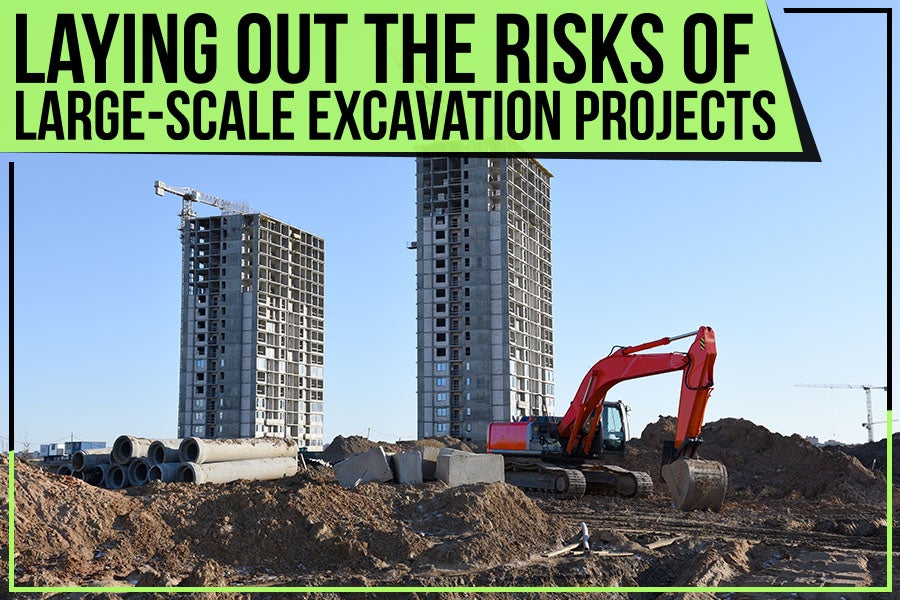
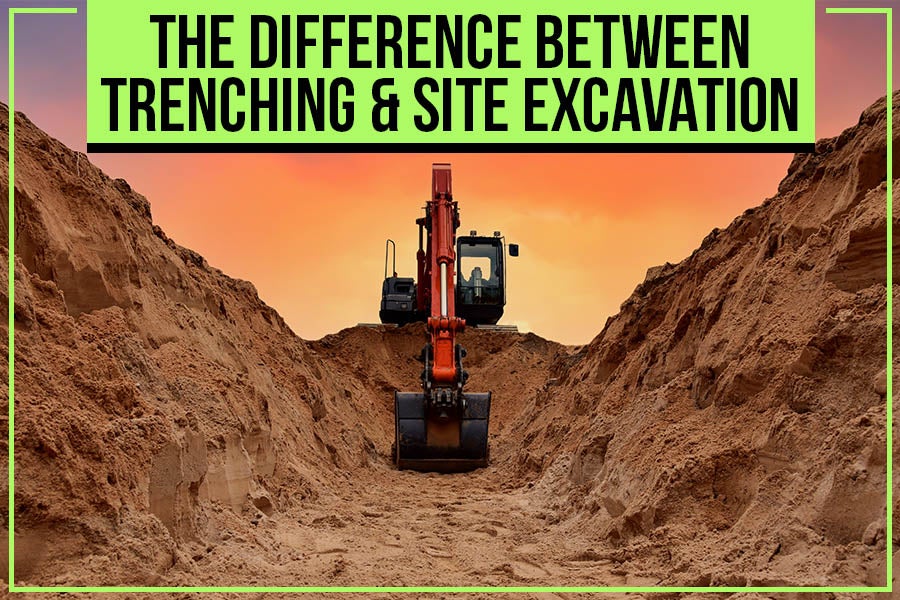
Key Takeaways: Trenching and site excavation are the two primary methods when you need to dig holes in your property. Both methods differ in various areas, such as purpose, machinery, and more. In trench excavation, you require small scaled machines to create a narrow and deep hole for the placement of utilities. On the other hand, site excavation is a more significant project that requires heavy machinery. Several kinds of construction projects require digging holes in the ground. This practice can fall into two main classes: trenching and site excavation. Though they may seem similar, there are some critical differences between the two that you should be aware of before starting your project. In this article, Dirt Werx LLC provides a detailed guide about the difference between excavating a site and digging a trench. What is trenching? Trenching is the process where you dig a narrow, deep hole in the ground. Generally, you will use it to create a foundation for a new structure or to install utilities such as water, sewer, or electrical lines. You may have seen excavation contractors at work as they dig those long, narrow ditches you sometimes see in construction zones. What is excavation? Excavating is the process of digging a large hole in the ground. It is used for construction projects such as building a foundation for a new home or office building. People also excavate sites for environmental purposes, such as cleaning up an oil spill. What are the differences between trenching and site excavation? Let's get into the details of trenching first. Trenching is narrow, shallow-ditch Before we go into further details, make sure you don't confuse trench excavation with simple excavation, as the two can mean different things. Trenching creates a narrow, shallow ditch in the ground. These ditches are typically no wider than 15 feet, and the depth is also not more than 6 feet. Their narrowness will become more apparent as you learn about their uses. Used for utility lines Utility lines include a line laid down for any specific purpose. For example, the gas in your homes that you use to cook your food or heat your home comes from one of these utility lines. Someone, at some point, dug a hole, placed the pipe in it, and then refilled the hole. This is an example of trench excavation. Used for water and sewer lines Similar to utility lines, the water and sewer lines are also created by trenching. In both cases, a ditch is dug to place the pipe and refilled after the pipes have been sealed. Without these ditches, a water or sewer line network would be nearly impossible. Other uses of trenches include underground cables or electricity lines. To keep these connections hidden from view and to protect them, they are placed in ditches, and then the ditch is refilled. The concealment protects the lines and ensures they are not tampered with or damaged. Machinery required Trench excavation requires minimal machinery if the hole isn't any deeper than a few feet. For most home projects, a shovel will suffice. If you need to dig a deeper trench, you will need to rent a small tractor or trencher. You can always call an excavation contractor to gain some insight into the recommended machines. Now, let's examine what excavation entails: Site excavation requires heavy machinery Heavy-duty machinery such as backhoes, excavators, and bulldozers are required to remove large amounts of dirt and rock from an area - which is what we call site excavation. Obviously, you cannot excavate a construction site on your own, meaning DIY is off limits. The expertise and heavy machinery required make hiring an excavation contractor mandatory. For digging larger and deeper holes In its essence, site excavation means digging larger holes, distinguishing it from trenching. Unlike trenches, there's no limit to how large a hole can be, as we have seen in the previous point. The depth is also not restricted, making it possible to go as deep as needed. The power of water Water is one of the most potent tools during site excavation. The contractor will use it to break down hard materials such as rocks so they can be removed easily. Water is also used to clean the area and get rid of debris. When the excavation contractor lets the water run through the site, it will remove any small stones or pebbles, making the process much smoother. The use of explosives Sometimes, the contractor will need to use explosives to remove large rocks or boulders. This is a hazardous process and should only be attempted by experts with the proper training. Commercial sites are generally excavated using large machinery that can handle the weight and size of the rocks. Used for construction and foundations As it may have become apparent at this point, site excavation is mainly used for construction purposes. Without a clear foundation and land to build on, no construction can take place. To ensure that the construction site is level and ready for building, the excavation process is helpful to level out the land. This is done by using large machinery to remove any rocks or debris that may be in the way. When is trenching and excavation the best solution for your property? There are many cases where trenching and site excavation may be the best solution for your property. If you plan on doing any construction, you will need to have clear and level land to build on. To do this, you will need to use either trench excavation or site excavation. Another case in which these two solutions may be the best is if you have issues with your drains. If your drains are not draining properly, it could be due to a blockage. To clear the blockage, you must dig a trench or excavate the area around the drain. Ending Note: Homeowners need to know the difference between trenching and site excavation to make an informed decision when hiring an excavation contractor. Trenching is generally less expensive, but it can also be less reliable. Site excavation is more costly but provides a more comprehensive and lasting solution. Dirt Werx LLC is your go-to excavation contractor in Easton, PA. We have the experience, knowledge, and required machinery to get to the bottom of your drainage issue and more. By availing of our site excavation service s, you will have a more permanent solution to your newly laid foundation. Get a free estimate today.

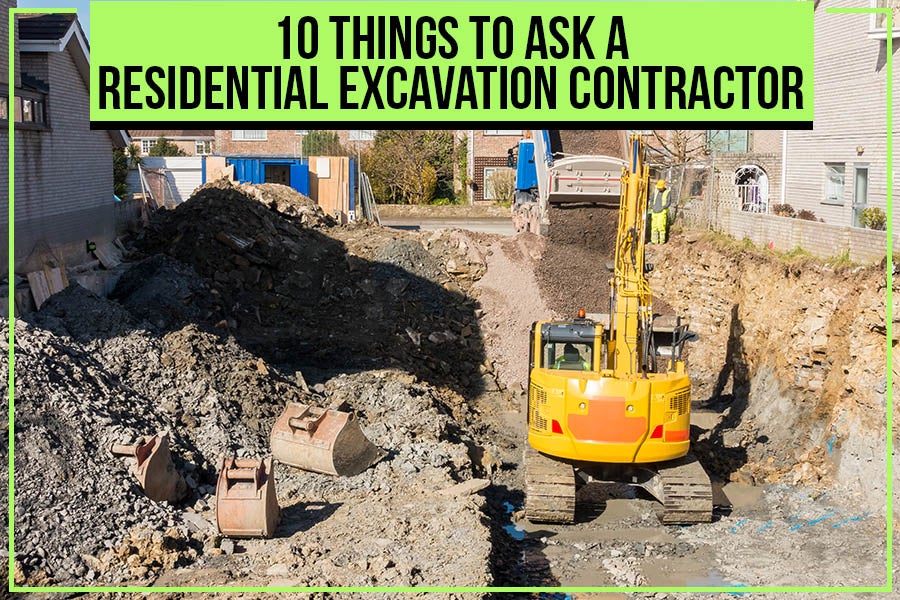
10 Things To Ask A Residential Excavation Contractor

Key takeaways: Residential excavation is a big job, and there are a lot of things that can go wrong. Make sure you ask your contractor the right questions before work begins. Ask about the license, insurance, and experience. Make sure you understand the timeline, the communication method, and the scope of the project. Finally, ask about references and written estimates – then proceed with the final project contract. Before you can put in a pool or build a new house, the ground needs to be prepped. The right equipment, knowledge, and skills are required for excavation to be done safely and successfully. Choosing a respectable excavation company is the best line of action, but how can you accomplish that? Luckily, Dirt Werx LLC brings the ten questions you can ask a residential excavation company to choose the right one. Since every work is unique, make careful to go through the particulars of your project with your contractor. But these are a few basics that will help you get started. What Is Residential Excavation? Residential excavation is moving earth or rock from one location to another. It can also involve breaking up the ground to make moving easier. This work is typically done with large excavating machines called bulldozers. Still, hand tools may also be used by the contracting team in some cases. Residential excavation is typically done for two reasons: to prepare a construction site or dig out a space for a new foundation. Excavation will probably be necessary if you intend to conduct any work on your house. Things To Ask Your Excavation Contractor: Question 01: Are You Licensed? A company's license proves that its employees are qualified to manage your project safely. It demonstrates that the contractors have the necessary training to operate any machinery safely. Check with your state's licensing board to confirm that the contractor you're considering is properly licensed. Question 02: What Is Your Experience with Excavation? When it comes to excavation, experience is key. When excavating property, there are many factors and several potential problems. Different types of soil under the surface, such as muddy or sandy soil, run the danger of collapse. If damaged, buried electricity or gas lines can be fatal and cause significant damage. An excavation contractor should be knowledgeable enough to manage every work component. They'll know exactly what to watch out for and what safety precautions need to be taken. Ask them about similar projects they have completed in the past and request references from those clients. Question 03: What Is the Scope of The Project? Your contractor must know the project's scope to get an accurate quote. This includes the size of the area to be excavated and the type of material that needs to be removed. The quote will also be based on whether or not you need the excavated material to be removed from your property. Question 04: How Long Will the Project Take? The length of time required to complete an excavation project will vary depending on the scope of the work. A small job may only take a day or two, while a larger project could take weeks or even months. Your excavation contractor must be able to provide you with a project timetable so you can make appropriate plans. Question 05: What Type of Equipment Will Be Used? The type of equipment used for your excavation will depend on the size and scope of the project. A small job may only require a Bobcat or other small excavator. In contrast, a larger project could require a full-size excavator. Your contractor should have the right equipment for the job and provide you with a list of the equipment that will be used. Question 06: What Type of Insurance Do You Have? All reputable excavation contractors should have liability insurance to protect themselves and their clients in case of an accident. Ask your residential excavation contractor about their insurance coverage and get a copy of their policy to review. Question 07: Who Is Responsible for Permits? In most cases, the excavation contractor will be responsible for obtaining the necessary permits. However, it's important to verify this before hiring anyone. You don't want to be on the hook for any fines or penalties associated with work done without a permit. Question 08: Is Cleanup Included? Ask your residential excavation contractor if cleanup is included in their quote. You don't want to be in a big mess after the job is done. Question 09: How Will You Communicate with Me During the Project? You may have some ideas about how you would want to receive information about your project now that every kind of technological communication is at your fingertips. Your contractor probably likes to interact in a certain fashion as well. This might be through daily emails, cloud-based calendars, or even simple phone conversations. Make sure you are aware of the communication and informational methods used. If you prefer one format over another, let your contractor know. It's crucial to have this conversation upfront so that there are no surprises later on regarding how you will be informed about your project and expectations are handled from the beginning. Question 10: What Are Your Payment Terms? Be sure to ask about the payment terms before work begins. You don't want to be surprised with a bill that you can't afford to pay. Inform your contractor if your finances are tight so that they may work with you to develop a payment schedule that works for both of you. It's also important to find out if there are any discounts available. For example, some contractors may offer a discount if you pay the bill in full upfront. Also, get a written estimate so you have a record of what was agreed upon. Ending Note: Residential excavation can be daunting, but it doesn't have to be. By asking your contractor the right questions, you can ensure that the job is done properly and according to your expectations. Need an excavation contractor? Dirt Werx LLC, serving Bethlehem, c an help! We can do everything for the complete development of your site, including clearing the soil, grading with accuracy and finishing touches, demolition, excavation, and laying of underground utilities. Our professionals will perform any necessary site work on a schedule and within budget. Get a free estimate today!

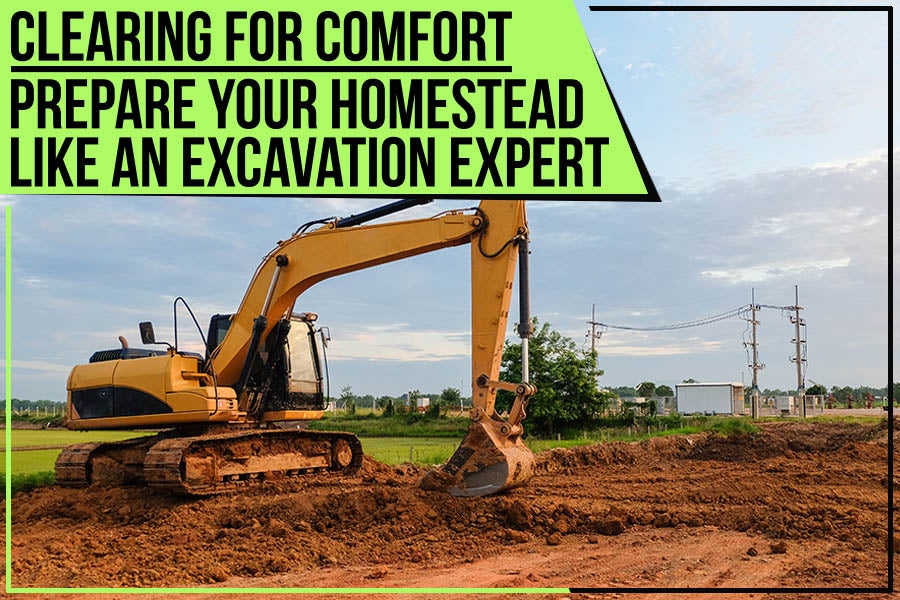
Clearing For Comfort: Prepare Your Homestead Like An Excavation Expert

Key Takeaways: Land clearing is an essential step in excavation work It promotes usability, safety, and value for your property Your contractor should have tree and brush clearing in his job description Before clearing, it's necessary to survey and research your local permits It's not often that homeowners have to worry about things like excavation work. But when you're preparing to build a house, many steps must be taken to ensure the process goes as smoothly as possible. One of those steps is clearing the land for your new home. In this blog post, we'll address the ins and outs of how to clear your land for construction like an excavation expert! Why Clear the Land Before Building? Before we scrape into the nitty gritty of land clearing, let's first discuss why it's essential to clear your land before you begin building. There are a good many reasons for this. No. 1: Usability A patch of land left to go wild might come across as entirely unlivable. But with some excavation work, you can turn that same patch of land into a usable piece of property on which you can build your dream home. No. 2: Safety Unforeseeable hazards like rotting stumps, high brush, and large boulders can present a safety hazard to you and your family. By clearing your land, you can avoid these hazards and provide a safe environment for yourself and those you love. No. 3: Disease Untended vegetation can harbor all sorts of diseases. By clearing your land, you can avoid these diseases and create a healthy environment for yourself and your plant life. No. 4: Growth When a plot is overgrown with vegetation, it can be difficult for new growth to take root. Clearing your land allows new, healthy growth and creates a thriving environment for yourself and your plant life. No. 5: Fire Dead trees and overgrown vegetation spell fire hazards for your property. By clearing your land, you can avoid these hazards and ensure safety for yourself and your neighbors. No. 6: Pests Rats, snakes, and other pests love to hide in overgrown vegetation. Chase them away by clearing your land and making it inhospitable for them. Not only will this make your homestead more comfortable, but it will also help you avoid diseases that these pests can carry. No. 7: Value Aside from the whole aesthetic argument, having a cleared piece of land can increase the value of your property. If you ever decide to sell, a well-maintained and clean piece of land will make it much easier to find buyers willing to pay top dollar for your homestead. How to Get It Done Ready to unleash your inner excavation expert? Here are a few steps to get you started. Survey: Excavation work for home construction generally starts with a land survey. Plan for connection to an electrical grid, water, and sewage if these amenities are not already available. Assess: Any hazards, whether due to the elements or the land itself, need to be considered before work can begin. This is also the time to remove any large rocks or trees that might get in the way. Research: Depending on your location, you might need a few permits before you can start excavating. Make sure to research and budget for the cost of permits in your area. You don't want to get caught with excavation work underway and no permits to show for it. Clear large obstacles: Boulders, trees, and other significant obstacles can be removed with the help of an excavator. If you have much debris, you might want to consider renting a dumpster to clear it all away. Clear trees: This procedure isn't as simple as it sounds. You might opt for hiring a professional tree service if you have many trees. You might not want to remove all the trees on your property, but you should remove any that are in the way of your construction project. Remove stumps: You can't simply dig up a tree stump and expect it to be gone. You need to use a stump grinder or other tool to remove the stump. You might consider hiring a professional stump removal service if you have many stumps. Remove debris: Smaller issues like branches, brush, and leaves can be removed with a brush mower or other tool. You might consider hiring a professional debris removal service if you have much debris. What Mistakes Should I Avoid? Excavation work, especially land clearing, requires planning and precision. You should avoid a few critical mistakes, and we'll cover them below. No. 1: Not Quite Cleared We all carry a romanticized image in our minds of a house on a hill, the sun setting behind it, and a gentle breeze blowing through the trees. In reality, too many trees close to your plot will obstruct equipment like crane arms and bucket loaders, making the clearing process more difficult and expensive. You should also be aware of the danger of falling trees during a storm - if they hit your house, you could be facing some serious repairs. No. 2: To Brush or Not The brush is the smaller, leafier growth that covers the forest floor. It's essential to remove as much of this as possible before beginning construction, as it can quickly become a fire hazard. On the other hand, getting rid of it can be very expensive if you have a lot of it. Ensure that quotes from an excavation expert include brush clearing in the job description. No. 3: Estimating Errors Always ensure that your quotes are in-person and on-location when hiring a contractor for your excavation work. It's easy for a contractor to lowball you over the phone or online and then show up on your property to find that the job is much larger than anticipated. This will result in them charging you more money or doing subpar work. No. 4: DIY Daredevil Brush clearing on its own requires incredible skill and stamina from a DIYer, but a wooded lot demands even more. Experts use specialized equipment like chainsaws, feller-bunchers, and skidders to clear land quickly and efficiently. If you're inexperienced with this work, it's best to leave it to the professionals. Need some help hiring a contractor? Not to worry, Forbes offers a checklist and tips. Conclusion Clearing land for your home takes preparation, precision, and sometimes professional help. By understanding your land and what you want to do with it, you can create a comfortable space for yourself and your family. If you feel there's room for further improvement, check out our article on choosing the right retaining wall for your property. Dirt Werx LLC is proud to offer homeowners in Allentown, PA, a wide variety of excavation services. Get your free estimate today!

How To Choose The Right Horse Arena Sand Depth For Jumping

Key Takeaways: More sand isn’t always the best option for a horse arena. The size and shape of sand particles are essential considerations to ensure stability and safety. 4-5 inches of depth is recommended for high-impact activities such as horse jumping. Levels of dust, cushioning, traction, and moisture impact the horse’s footing. The horse arena sand depth can significantly impact your horse's performance, especially when it comes to jumping. Too shallow, your horse may not get the traction it needs to take off; too deep, it could end up stuck in the sand. Since sand is an affordable and popular option for most riding arenas, it's your go-to option. It's also relatively inexpensive, has the right amount of spring for protecting the horse's legs, and is easy to find. So how do you choose the right level of sand depth for a horse jumping arena? Well, that's the tricky part. There are certain critical aspects to consider when choosing the proper horse arena sand depth. Most horse jumping arenas consist of 4+ inches of sand but do the horses sink in or stand upright? The key to understanding the appropriate horse arena footing depth is to start with sand with suitable characteristics, additives, and maintenance. Want to learn more about the maintenance and construction of horse-riding arenas? Here's some more information you can check out. In further detail, let's discuss the various aspects of choosing horse arena sand and footing depth. Common Misconceptions About Horse Arena Sand Depth More Sand Means More Depth This can be true if the sand isn't the right type or dry. The footing depth can be optimal with the appropriate additives, maintenance, and type. It ensures the horses get a proper cushion to absorb shocks without riding in deep sand. A Shallow Depth Of 1-2 Inches Is a Better Depth Shallow sand can cause extreme wear and tear on the horse's joints and isn't the best option for the longevity of the horse arena. What's an Appropriate Sand Depth? The sand depth should be around 4 inches deep by combining proper additives and sand quality. It offers an upper jumping level and superior shock absorption. In the case of training horses, the mid to low levels of 3 inches of horse arena sand depth are sufficient. What's more, based on the characteristics of the sand, you may be limited to a horse arena footing depth of fewer than 2.5 inches. This level of depth works best for light work. When starting, you can save a lot of time and headaches in the long run if you get an ideal quality and quantity of sand. The perfect horse arena sand depth level will help your horses ride optimally. Higher levels of sand depth can be critical. Choosing The Best Kind of Sand You need to consider certain factors when examining the best kind of sand to implement in your arena. The Shape of The Sand Particles The shape of sand particles is a critical aspect when selecting sand. For instance, certain particles like river or beach sand can be round. Meanwhile, quarry sand can appear to be a quartz shape and sharper. Both kinds of sand can be helpful in different scenarios. For instance, sharper and angular sand particles offer more stability, while round particles provide a cushion. A combination of both these materials ensures that the horse performs its best without excessive wear and tear. The Size of The Sand Particles Sand particle size depends on the kind of horse riding in the arena. Particularly for high-impact sports such as horse jumping, the sand needs to compact well and support the horse's weight while providing cushioning. Particle size is measured in millimeters. A good range to aim for horse jumping is 0.5-1mm. Moreover, you can also use coarse sand, where every particle has a diameter of up to 2.0 mm. Regardless of the size, you're choosing to combine different sizes and compositions can allow the footing to be more consistent and connected. What's The Best Way to Choose Horse Arena Footing Depth? If you're building a mid-sized arena, a large arena, or a dressage arena, you always require three primary layers. Each level is crucial to keep the riders and horses safe from injuries. The bottom layer is the drainage layer. The second layer is the level of support, and the third layer is the horse arena sand. The layers must be correctly distributed to offer stability and comfort for both horse and rider. However, if you want to install an all-weather horse arena, you'll need a fourth layer, an all-weather surface like waxed sand footing or rubber mats. In the case of a dressage arena, a depth of 0.5-1mm of sand is recommended as it provides good cushioning for the horse's hooves and allows them to get good traction. Using a depth of 1-2 inches (2.5-5cm) of sand is recommended for a jumping arena. This will provide good cushioning for the horse's hooves and help to protect them from impact. While refurbishing the arena, you'll also have to decide the composition of the dressing and the subsurface layers. Before doing so, there are a few crucial factors you must consider. Dust Free The dust the horses kick up depends on the footing material and the moisture. A dust-free sand arena requires consistent watering and additive materials. Moisture Moisture is essential for the horse's footing as an overly dry arena will make the footing slippery and dusty. Moreover, a muddy arena will prevent proper movement and cause horse discomfort. Traction Proper traction ensures the horse doesn't slide around, but too much can be detrimental. Guaranteeing a perfect balance is necessary to optimize the horse's movements without causing slips and injuries. Cushioning Cushioning stems from the top dressing and subsurface levels. How much cushioning your arena will require depends on the sports activities that take place in the arena. In the case of jumping, having a sturdy base with appropriate cushioning allows for ideal comfort for the horses. It's important to note that no rules exist for choosing the perfect composition for your horse arena sand depth. However, your levels of sand depth should remain consistent throughout the arena. Our experts at Dirt Werx LLC have been serving all across Pennsylvania and have completed significant projects successfully. If you're looking for professional contracting services such as excavation, horse arena maintenance, land clearing, and more, get in touch today! Get a free estimate!

Rescue Tips For If A Loved One Falls In A Septic Tank

Septic tanks are often the forgotten heroes of the home. They quietly and efficiently take care of the wastewater without any fuss. But sometimes, they make the news for all the wrong reasons. Do you remember a family in Pennsylvania who suffered a tragedy when their loved one fell into a septic tank? Dirt Werx LLC will discuss some rescue tips if you're unlucky enough to find yourself in this situation! 1. Call for Help Septic tanks are dangerous and can cause severe injury or even death if someone falls in. They contain bacteria and other hazardous substances that can cause severe illness or death. Call 911 immediately and wait for trained professionals to arrive before doing anything else. They have the expertise, tools, and equipment for any rescue mission. 2. Don’t Try to Rescue the Victim Yourself If You Are Not Well-Trained It can be tempting to try and rescue a loved one who has fallen into a septic tank yourself, but it's important to remember that this is a dangerous thing to do. It's recommended to wait for trained professionals to arrive so the rescue can be carried out safely. Meanwhile, try to stay calm and reassure the victim that help is on the way. 3. Use a Ladder If the situation is too critical to wait for help, use a ladder and position it safely inside the tank to climb down and rescue your loved one yourself. But be very careful! Septic tanks can be dangerous places, and you could easily injure yourself. Only attempt this if you're sure it's safe. 3. Call the Fire Department You'll need to call the fire department if there's no ladder or you can't get one into position. They have the equipment and the training to rescue people from all sorts of situations, including septic tanks. 4. Safety Tips for Rescuing the Victim If you must enter the septic tank, wear protective clothing, including gloves, a face mask, and eye protection. Never let children or pets near a tank. Keep them well away from the area until the rescue is complete. Do not attempt to move or cover the septic tank opening. It could make the situation worse and put the victim at risk. Once your loved one is out, they'll need medical attention as soon as possible. There's a risk of injury or infection, so it's essential to get them checked out by a doctor. Preventing Septic Tank Accidents with Proper Inspection and Maintenance To avoid accidents related to septic tank, conduct regular inspections and maintain them routinely. At Dirt Werx LLC, we help homeowners across the Lehigh Valley, including areas like Nazareth, Easton, and Allentown—stay ahead of costly and dangerous septic issues. So if you just moved into an older home, or it’s been years since your last tank inspection, don’t wait for something to go wrong. Our team provides septic tank safety inspections, routine pumping services, and leak detection solutions that are designed to catch small problems before they become emergencies. Planning to buy a property with an existing system? We provide real estate septic inspections to verify that everything complies with regulations and functions safely. If you need septic tank inspection anywhere in Eastern Pennsylvania, or want to learn more about preventing septic system failures, reach out to Dirt Werx for a free quote today. Ending Note Septic tanks are dangerous places and should be treated with caution. If someone falls into one, don't panic, but please remember the above tips. Dirt Werx LLC serving Nazareth, PA, would like to remind all homeowners to have their septic tanks inspected and pumped regularly to avoid such tragedies. Please contact us today if you need proper installation or maintenance of your septic tank or to get a free estimate.

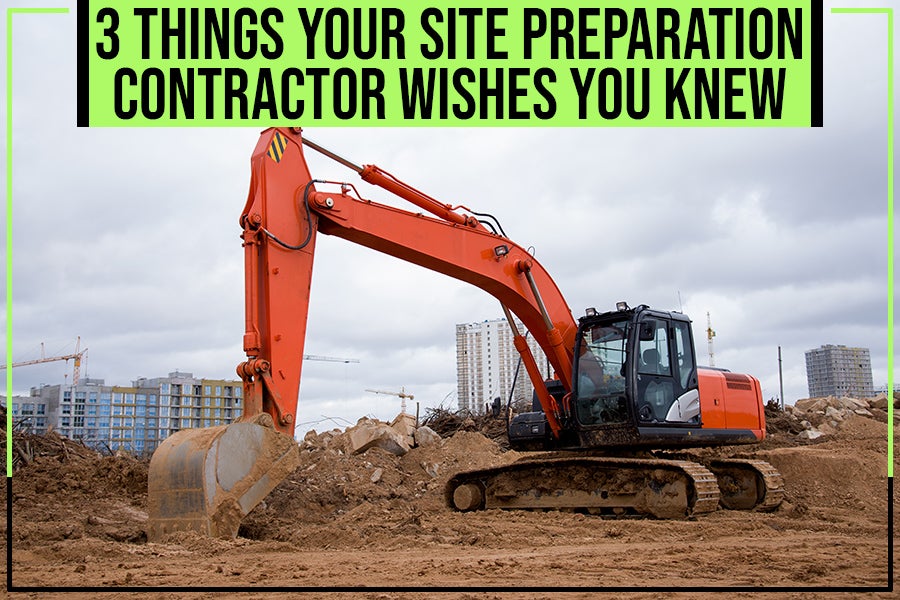
3 Things Your Site Preparation Contractor Wishes You Knew

Building the foundation for a new home or commercial structure is a critical part of the construction process. As you may already know, site preparation is the initial step where it all begins. The site preparation process is long and cumbersome, and there are a few essential things that your contractor wants you to know. Dirt Werx LLC will take you on a journey where you will learn all the fundamental requisites that prepare the foundation for your new home. We understand that you may be anxious to get the construction process underway. Still, it is essential to remember that rushing site preparation can result in many problems down the line. With our years of experience in site preparation, we know all too well what can go wrong. To help you understand, we compiled a list of things that your site preparation contractor wishes you knew: 1. The Importance of Site Assessment Before any work begins, your contractor must conduct a site assessment. This will involve factors such as the terrain, soil type, and any existing structures on the site. All these elements will play a role in how the site preparation process unfolds. 2. The Right Time to Start Site Preparation Timing is everything when it comes to site preparation. An early start can lead to ground settling, causing your entire process to experience an unintended delay. Similarly, if you begin the process too late in the season, you risk your work being disrupted by bad weather. 3. Determining the Soil Type An essential step is determining the soil type, which can change based on location. The soil type helps the contractors decide which equipment to use and how long the process will take. There are four basic categories of soil: sand clay silt loam Different Steps in Site Preparation Excavation Your site contractor will initiate the process using an excavator to clear the land. All the obstacles are removed, including trees, shrubs, roots, or other physical obstructions. Grading Grading is leveling the surface of the land. The contractors usually do this using a skid steer with a grading attachment. The grade of your land will be determined by the intended purpose of the construction project. Clearing and Drilling The process doesn't end here. Your contractor will level it out after drilling the land for construction and follow it by drilling. Compacting Once the soil is compacted, it will be more stable and less likely to settle. Your site preparation is now complete and ready for the construction to start! End Note: Knowing this imperative information will make the process easy for you and your contractor as you both understand things without being said. This could save your time and accelerate the construction manifold. Regarding high-quality site preparation, Dirt Werx LLC, serving Macungie, PA, is your choice! Get the top-rated services for all your site preparation needs by contacting us today! Get a free estimate!

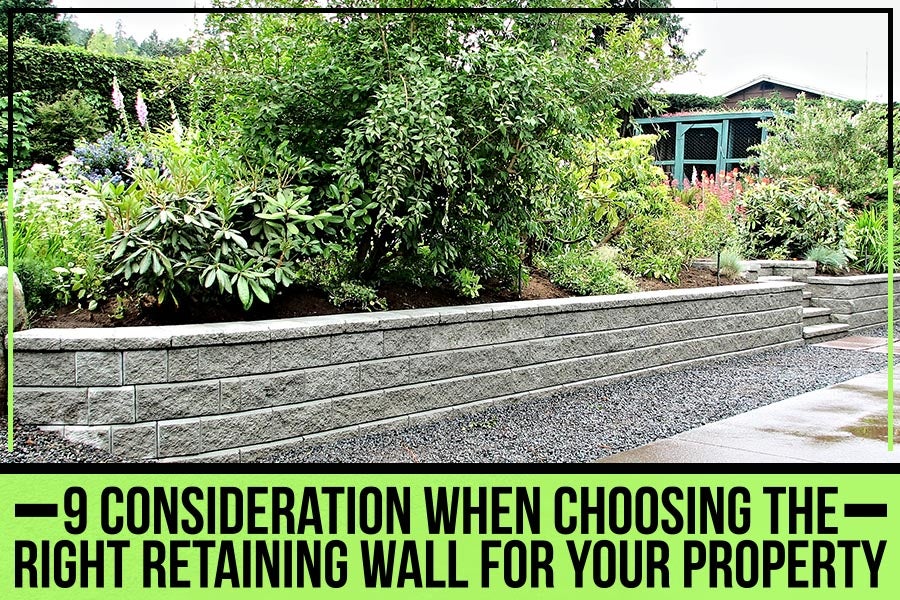
9 Consideration When Choosing The Right Retaining Wall For Your Property

The benefits of having a retaining wall are very clear. Not only does it beautify your property, but it also helps to keep landscaped terraces of soil in place and manage water runoff. With so many creative designs of retaining walls on the market, it can be challenging to determine the right one for you. In this blog post, we'll give you pointers on how to choose the right retaining wall for your needs. So, continue reading! 1. Location - The soil texture, slope, and drainage patterns are a few factors to consider when deciding on your retaining wall's location. A firm and well-drained soil offers maximum support to a retaining wall. 2. Type of Retaining Wall - There are multiple retaining wall types available in the market, like timber, concrete, brick, and stone walls. The selection depends on many factors, such as the purpose of the wall, height, and load-bearing capacity. 3. Size of Retaining Wall - The size of your retaining wall will be determined by its purpose. A smaller wall will suffice if you're looking to accent your landscaping. However, if you're looking to create more functional space or manage runoff from a larger area, you'll need a taller and broader wall. 4. Structural Support - Gravity alone will not be enough to hold the soil behind the retaining barrier. You'll need additional reinforcement methods to support the wall and ensure its longevity. 5. Drainage System - Water is the biggest nemesis of a retaining wall; you need to ensure the wall has a proper drainage system to avoid water damage. 6. Materials - You can use many materials for a retaining wall, and each offers unique benefits to go with factors like heat & precipitation – which can influence the soil. Work with a qualified retaining wall installer to choose the best material for your needs. 7. Maintenance and Repair - Even the best-built retaining walls will need regular maintenance and occasional repairs. Develop a foolproof plan to avoid these eventualities. 8. Consider the Purpose of the Retaining Wall – Are you looking to create unique outdoor living spaces? Improve your home's curb appeal? Protect your property from water damage? The retaining wall's purpose - why you need the retaining wall - will help determine the best material and style for your needs. 9. Durability - Retaining walls are subject to a lot of wear and tear, so choosing a material that can withstand the elements is essential. Some popular choices include concrete, stone, and brick. How Does Your Property Benefit From A Retaining Wall? Retaining walls can offer many benefits to your property. You can use them to create unique outdoor living spaces, increase your home's curb appeal, and improve the overall value of your property. When appropriately installed, retaining walls can also help to prevent soil erosion and protect your home from water damage. If you require a retaining wall for your property, Dirt Werx LLC is the company to call in Easton. Our excavation experts will help you choose the right retaining wall for your needs and install it quickly and efficiently. Contact us today for a free estimate on retaining walls installation!

Tasteful Disposal: 5 Types Of Residential Septic Systems

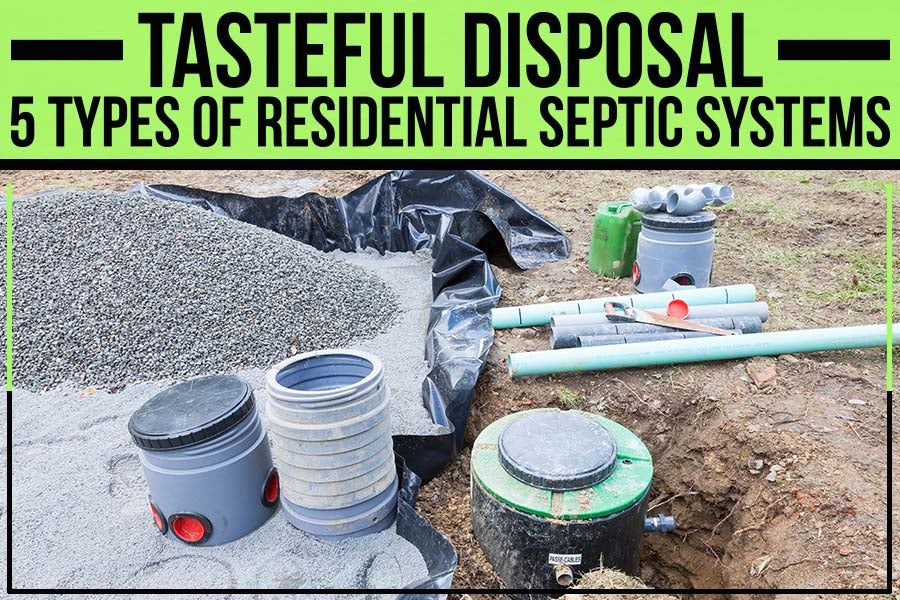
When it comes to residential septic systems, there are a lot of options out there. And while each type of septic system has its own set of pros and cons, there's one that's sure to suit your needs. In this blog post by Dirt Werx, LLC, we'll explore the different septic systems available for residential properties. We'll cover everything from conventional septic systems to alternatives like composting toilets. So, we've got you covered whether you're looking for an environmentally-friendly solution or simply the most cost-effective option. Let’s explore the wonderful world of septic systems. 1. Conventional Septic Systems The most common type of septic system is the conventional septic system. This system typically consists of a tank and a leach field, and it's the best option for properties with enough space to accommodate both. Conventional septic systems are also relatively easy to install and maintain, making them a popular choice for residential projects. However, they do require regular pumping (every three to five years), and they can be expensive to repair if something goes wrong. 2. Mound Septic System This type of septic system is built on a mound of soil that helps with water absorption. Wastewater is pumped from the house to the septic tank and then dispersed through a series of leach lines. Mound systems are typically used in areas with high water tables or poor drainage. They're also more expensive to install than conventional systems but require less maintenance and pumping. 3. Aerobic Septic System An aerobic septic system uses oxygen to break down wastewater. It typically consists of a tank that houses bacteria that break down the waste. These systems are more expensive to install than other types of septic systems, but they're much easier to maintain. Aerobic systems also don't require as much space as other options, making them a good choice for smaller properties. 4. Composting Toilets Composting toilets are a great alternative for those who want to be more environmentally friendly. These toilets use natural processes to break down human waste into compost. You can use composting toilets in areas where traditional septic systems are not permitted and they don't require as much maintenance. However, they can be more expensive to install, and you'll need a place to store the compost. 5. Graywater Systems Graywater systems are another alternative to traditional septic systems. Graywater is wastewater from sources like showers, sinks, and washing machines. Unlike blackwater (wastewater from toilets), gray water is relatively clean and can be reused. Graywater systems collect and treat greywater so you can reuse it for watering plants or flushing toilets. These systems can be more expensive than traditional septic systems, but they are a great way to conserve water. Conclusion If you're looking for an alternative to traditional septic systems, there are plenty of options available. From graywater systems to composting toilets, there's sure to be an option right for you. So do your research and find the perfect septic system for your home. After all, your home is your castle. It deserves the best! Dirt Werx LLC, serving Bethlehem, PA, has you covered for all your residential septic system needs! We have a team of professional installers who will ensure your septic tank performs well and lasts for years! Contact us for a free estimate now!

Contact Us

Fill out this form below and we'll contact you shortly
*Required Fields